

Vinyl Banner Finishing Guide
Choosing the right finishing option helps your banner hang correctly and look its best. Use this guide to understand the most common finishing options and when each one may be useful.

Hems & Grommets
Folded and reinforced edges with metal grommets for easy hanging.
Best for: Most indoor and outdoor banner installations.
installation: Use zip ties, rope, bungees, hooks, or similar fasteners. Attach to secure mounting points and distribute tension evenly.
Hems Only
Folded and reinforced edges without grommets for a clean finished edge.
Best for: Custom installations where standard grommet holes are not needed.
Installation: Requires another mounting method, such as clips, clamps, a display system, or other appropriate hardware. Confirm your installation method before ordering

Helvetica Light is an easy-to-read font, with tall and narrow letters, that works well on almost every site.
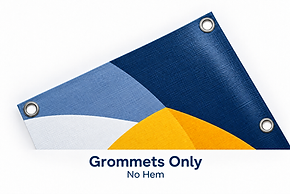
Grommets Only
Metal grommets are added for hanging, but the banner edges are not hemmed.
Best for: Short-term or controlled installations where easy attachment is needed without reinforced edges.
Installation: Use zip ties, rope, bungees, hooks, or similar fasteners. Avoid excessive tension, especially outdoors.
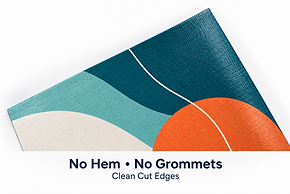
No Hem + No Grommets
A clean-cut banner with no reinforced edges or mounting holes.
Best for: Indoor displays, frames, custom display systems, or projects where finishing will be added separately.
Installation: Requires a separate mounting system. Confirm how the banner will be installed before ordering.
Pole Pocket
A sleeve is created along the banner edge so a pole, rod, or dowel can slide through it.
Best for: Hanging displays, poles, trade shows, suspended banners, and installations where visible grommets are not preferred.
Installation: Slide a compatible pole or rod through the pocket. Pole diameter, pocket size, and pocket location should be confirmed before ordering.


Reinforced Corner
Additional material reinforces the corners to strengthen high-stress mounting points.
Best for: Larger banners and installations where the corners may receive additional tension.
Installation: Attach through the reinforced mounting points and distribute tension across the banner. Do not support the entire banner from only one or two corners.
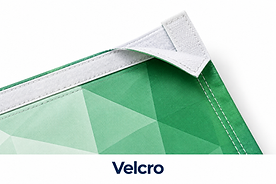
Velcro
Hook-and-loop material is added to the banner for a clean, removable attachment.
Best for: Indoor walls, display panels, trade-show booths, exhibits, and banners that need to be changed frequently.
Installation: Requires a matching hook-and-loop surface securely attached to the wall, panel, or display structure.

Rope Sewn
Rope is sewn into the banner edge, with rope extending from the ends for tying.
Best for: Banners mounted between posts, poles, fences, or other secure anchor points.
Installation: Tie the extending rope to secure anchor points. Keep the banner evenly tensioned without overstretching the vinyl.
Webbing & D-Ring
Heavy-duty webbing reinforces the banner edge and D-rings provide strong attachment points.
Best for: Large banners, demanding installations, or applications requiring stronger attachment hardware than standard grommets.
Installation: Attach the D-rings to suitable hooks, cables, carabiners, straps, or other appropriate hardware. The supporting structure must be suitable for the banner size and installation.

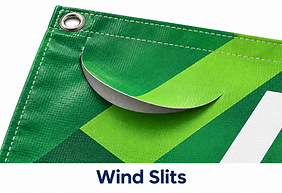
Wind Slits
Small openings are cut into the banner to allow some air to pass through.
Best for: Certain outdoor installations where wind exposure may be a concern.
Installation: Mount the banner securely with even tension. Wind slits do not make a banner suitable for severe weather. Remove banners during strong winds or storms.